
 | The goal of this article is to give simple and clear directions to modify a Bronco L. 3-33 or L. 3-35 obtaining an accurate replica of vehicles of "first" and "last" type (these two type definitions are according to what's written on the official documentation regarding these vehicles).
If anybody has got further evidence to correct or integrate the article's and is willing to share them is more than welcome and can submit them joining the M+ discussion Forum following the link at the end of the article. |
The Bronco L. 3-33 and L. 3-35, booth referred by the chinese manufacturer as of "late production" are both, in my view, a very good base to obtain without huge efforts historically accurate models. In terms of detail, overall quality of the parts and their thickness the Bronco kits are far a lot better than any previous offer in resin or white metal. Le following tables indicate the various modification to be made to cope vith the various production standards:
| From the Bronco (Serie II) to a production a L. 3-33 of "first type" | External details
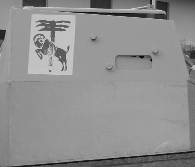
- for the vehicles in service up to the beginning of the Guerra per l'Impero (Empire War, october 1935) the side fenders need the addition of the clamps for the iron lever and the shovel. The above mentioned tools have also to be scratchbuilt (Image 1, Image 2)
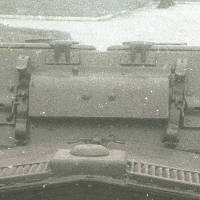
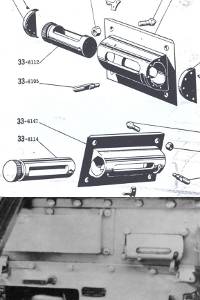
- add the clamps for the Fiat Mod. 35 MG tripod on the engine deck and scartchbuild the tripod itself (for vehicles in service up to 1937) (Image 3, Image 4, Image 5)
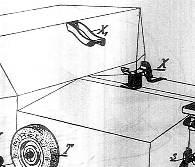
- scratchbuild the iron lever, the showel and their clamps on the back of the hull (for vehicles in service after 1937) (Image 6, Image 7)
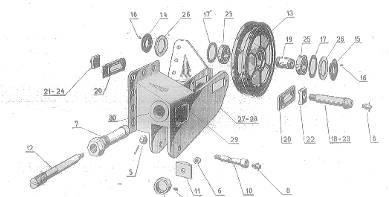
- scratchbuild the track tightner mechanism (Image 8, Image 9)
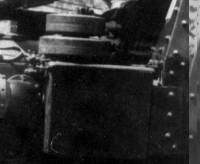
- modify the bracket of the track tightener system (it has to accomodate in height three bolts instead of two and has to be widened) (Image 10)
- replace the pilot's front viewing port (Image 11)
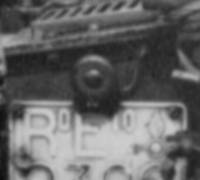
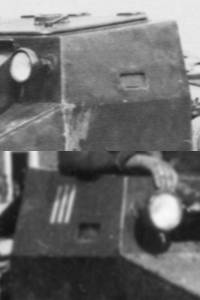
- add the tail light (Image 12)
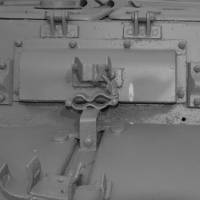
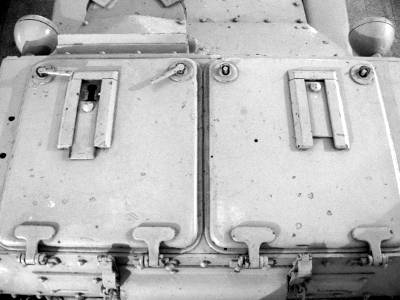
- modify the opening of the commander hatch correct in the position but not its shape (Image 13)
- the driver's right side view port has to be moved forward of roughly 3,5 mm (Image 14, Image 15)
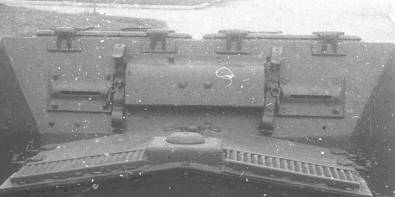
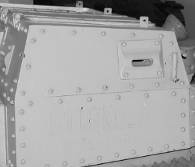
- on the front glacis (the one whit the inspection hatch of the drive and braking system) remove the upper 5 rivets and make 7 new ones (Image 16)
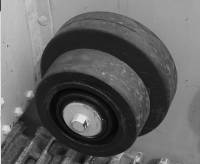
- remove the lower moulding from the roadwheels bogies (this is typical of the L.3-35) (Image 17)
- remove the three rivets around the side viewing ports of the combat room (Image 28)
Internal details:
- the vehicle is equipped with twinned Fiat Mod. 35 MGs so ammo shelves have to be scratchbuilt (Image 18)
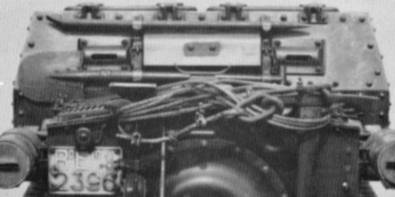
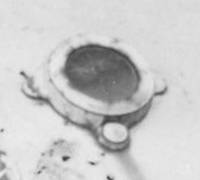
- the spent shells recovery box in front of the commander feet is missing (Image 10)
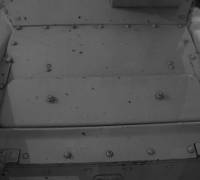
- the anti skid pattern should be added to the floor (Image 19)
- the opening brackets of the pilot's front viewer should be added (Image 21)
- should be added the "guillotine" of the side viewers and their locking system (Image 20)
- to the roof should be added the mounting for the curtain separating the driver from the commander (Image 18)
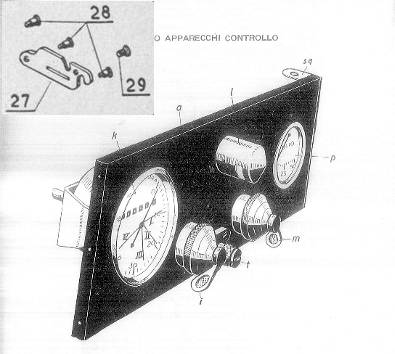
- the kit does not include the drivers instrument panel that should be scratchbuilt (Image 20)
| |
| From the Bronco L. 3-33 (Serie II) to L. 3-33 di "latest type" | External details:
- add the clamps for the Fiat Mod. 35 MG tripod on the engine deck and scartchbuild the tripod itself (for vehicles in service up to 1937) (Image 3, Image 4, Image 5)
- scratchbuild the iron lever, the showel and their clamps on the back of the hull (for vehicles in service after 1937) (Image 6, Image 7)
- scratchbuild a new air conveyor at the back of the superstructure (Image 22, Image 23)
- add the tail light (Image 12)
- modify the openings of both the crew hatches (the position and the shape are wrong) (Image 24)
- the driver's right side view port has to be moved forward of roughly 3,5 mm (Image 14, Image 15)
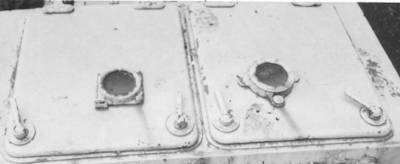
- add the spare track tension wheel (the smaller one) on the left and right side of the superstructure (Image 25)
- on the front glacis (the one whit the inspection hatch of the drive and braking system) remove the upper 5 rivets and make 7 new ones (Image 16)
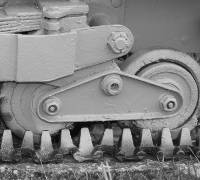
- remove the lower moulding from the roadwheels bogies (this is typical of the L.3-35 (Image 17)
Internal details:
- the vehicle is equipped with twinned Fiat Mod. 35 MGs so ammo shelves have to be scratchbuilt (Image 18)
- the spent shells recovery box in front of the commander feet is missing (Image 10)
- the anti skid pattern should be added to the floor (Image 19)
- the opening brackets of the pilot's front viewer should be added (Image 21)
- should be added the "guillotine" of the side viewers and their locking system (Image 20)
- to the roof should be added the mounting for the curtain separating the driver from the commander (Image 18)
- the kit does not include the drivers instrument panel that should be scratchbuilt (Image 20)
- the closing mechanism of the rear viewing ports should be scratchbuilt (Image 29)
| |
| Da L. 3-35 Bronco (Late production) a L. 3-35 di "primo tipo" | External details:
- scratchbuild the iron lever, the showel and their clamps on the back of the hull (for vehicles in service after 1937) (Image 6, Image 7)
- add the tail light (Image 12)
- modify the openings of both the crew hatches (the position and the shape are wrong) (Image 24)
- the driver's right side view port has to be moved forward of roughly 3,5 mm (Image 14, Image 15)
- do not install the armoured guards for the side viewing ports and scratchbuild new "guillotine" ones (Image 20)
- add the spare track tension wheel (the smaller one) on the left and right side of the superstructure (Image 25)
- on the front glacis (the one whit the inspection hatch of the drive and braking system) remove the upper 5 rivets and make 7 new ones (Image 16)
Internal details:
- the vehicle is equipped with twinned Fiat Mod. 35 MGs so ammo shelves have to be scratchbuilt (Image 18)
- the spent shells recovery box in front of the commander feet is missing (Image 18, Image 19)
- the anti skid pattern should be added to the floor (Image 18)
- the opening brackets of the pilot's front viewer should be added (Image 21)
- should be added the "guillotine" of the side viewers and their locking system (Image 20)
- to the roof should be added the mounting for the curtain separating the driver from the commander (Image 18)
- the kit does not include the drivers instrument panel that should be scratchbuilt (Image 20)
- the closing mechanism of the rear viewing ports should be scratchbuilt (Image 29)
| |
| Da L. 3-35 Bronco (Late production) a L. 3-35 di "ultimo tipo" | External details:
- scratchbuild the iron lever, the showel and their clamps on the back of the hull (for vehicles in service after 1937) (Image 6, Image 7)
- add the tail light (Image 12)
- modify the openings of both the crew hatches (the position and the shape are wrong) (Image 27)
- the driver's right side view port has to be moved forward of roughly 3,5 mm (Image 14, Image 15)
- add the spare track tension wheel (the smaller one) on the left and right side of the superstructure (Image 25)
- on the front glacis (the one whit the inspection hatch of the drive and braking system) remove the upper 5 rivets and make 7 new ones (Image 16)
Internal details: - the vehicle is equipped with twinned Fiat Mod. 35 MGs so ammo shelves have to be scratchbuilt (Image 18)
- the spent shells recovery box in front of the commander feet is missing (Image 10)
- the anti skid pattern should be added to the floor (Image 19)
- the opening brackets of the pilot's front viewer should be added (Image 21)
- to the roof should be added the mounting for the curtain separating the driver from the commander (Image 18)
- the kit does not include the drivers instrument panel that should be scratchbuilt (Image 20)
- the closing mechanism of the side and rear viewing ports should be scratchbuilt (Image 29)
| |
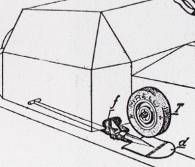 | 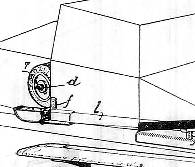 |  |  |
| Image 1: the shovel initial position * | Image 2: the tripod clamps * | Image 3: the Fiat MG tripod clamps * | Image 4: the tripod clamps ** |
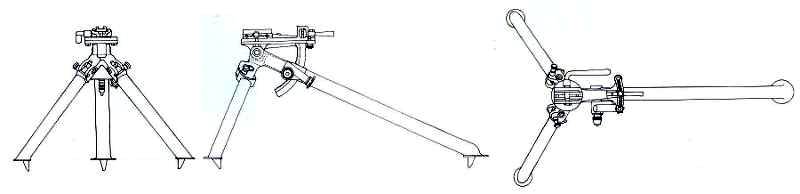 |
| Image 5: three views of the Fiat mod 1914 and 1914/35 tripod in opened position * |
 |  |
| Image 6: the L.3-33 "latest type" tool clamps positioning after 1937 ** | Image 7: the L.3-33 "latest type" tools positioning after 1937 |
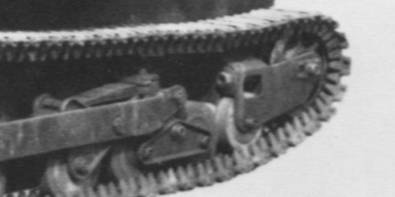 |  |
| Image 8: the L. 3-33 "first type" track tightening system ** | Image 9: the "first type" track tightening system from the repairing manual |
 |  |  |  |
| Image 10: the "first type" track tightening system mounting bracket | Image 11: the L. 3-33 "first type" driver viewer | Image 12: the tail light is missing on all of the Bronco kits | Image 13: the L. 3-33 (all) & 35 ("first type") commander hatch opening |
 |  |  |  |
| Image 14: the left side viewing port | Image 15: the "late" 35 viewing port | Image 16: the front glacis | Image 17: L.3-33 bogie |
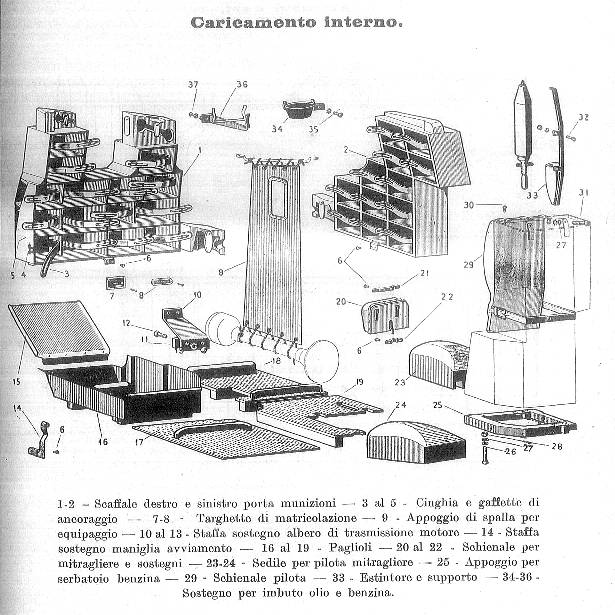 |
| Image 18: a view from the L. 3 instruction manual provides a good idea on the work to do to detail the kit interiors |
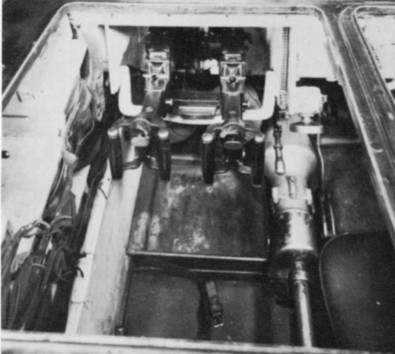 |  |
| Image 19: the spent shell recovery box | Image 20: the "guillotine" side viewers closing (top) and the driver's cockpit |
 |  |  |
| Image 21: the driver's front viewing port mounting bracket | Image 22: pre 1937 air conveyor | Image 23: post 1937 air conveyor |
 |  |  |
| Image 24: the 33 "latest type" and 35 "first type" hatches opening | Image 25: the spare wheels | Image 26: "radio tank" spare wheel |
 |  |  |
| Img. 27: the signalling openings at the top of the crew hatches change quite substantially in their shape | Img 28: the L. 3-33 "first type" side viewing ports have no rivets | Img 29: internal detail of the interiors of the "rubinetto" viewing ports |
Image credits: | * | Image taken from the technical manual or similar publication | | ** | Fabio d'Inzeo's archive | | *** | Prof. Nicola Pignato's archive | | **** | Fabrizio Vaccari's archive | | ***** | Image from "Carri Armati 2/I - Carri Veloci" - Edizioni Bizzarri - Roma 1973 and published for discussion purposes only in line with the current legislation.
Notice: please note that all of the images have been digitally signed with a system that allows to track them even if printed on paper or re-published on other digital media. This allows to verify in any moment if they've been used according to the rules that govern this site. | |
The
Gallerie di riferimento (Reference galleries) contain more than 380 pictures of different versions of L. 3. On top of that on the sitre are available for downloading the following original documents which can help in super detailing our models:
| Document | Size | Notes |
| Manuale del capocarro del carro L. 35
(Commander manual) | 21,7 Mb
| 1940 - Italian
|
Manuale del pilota del carro L. 35
(Driver's manual) | 19,6 Mb
| 1940 - Italian
|
Nozioni sull´uso-impiego e manutenzione del Carro Veloce 35
(Notions on the use and the maintainance of the CV 35) | 44,2 Mb
| 1938 - Italian
|
| Carro L. 3-33 - L. 3-35 e apparecchiature «LF» per detti
(L. 3-33 - L. 3-35 taknk and their «LF» equipment | 82,5 Mb
| 1941 - Italian
|
Manutenzione e impiego del Carro Veloce 33
(Maintainance and use of the CV 33) | 28,3 Mb
| 1935 - Italian
|
Manuale dello smontaggio, montaggio e riparazione del C.V. 33
(CV 33 assembling, disassembling and repairing manual) | 72,5 Mb
| Italian
|
Happy scale modelling everybody!!!
Note: to download the above mentioned manuals you have to be a registered user and be logged. Once done, you'll find them in the
G.I.S. Regio Esercito section


